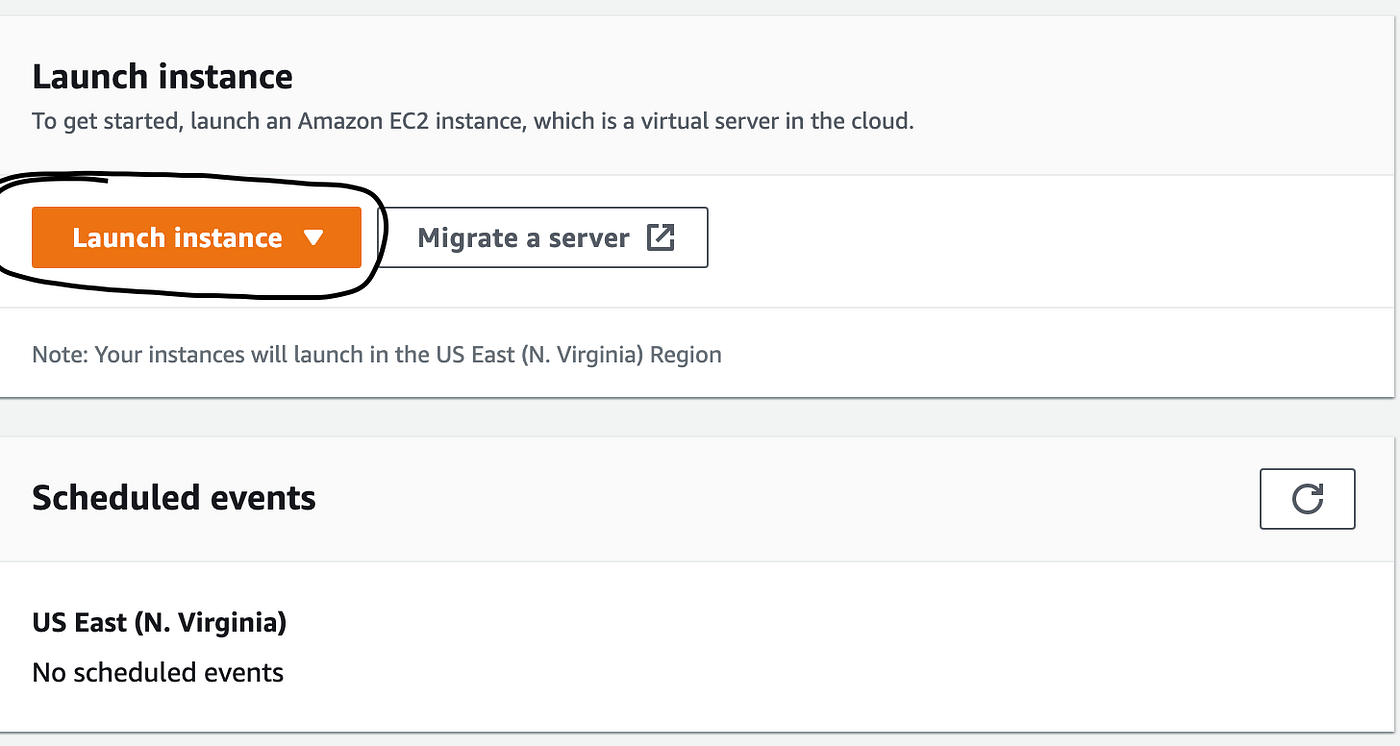
Go to https://console.aws.amazon.com/ec2
Click on Launch Instance button to add new EC2
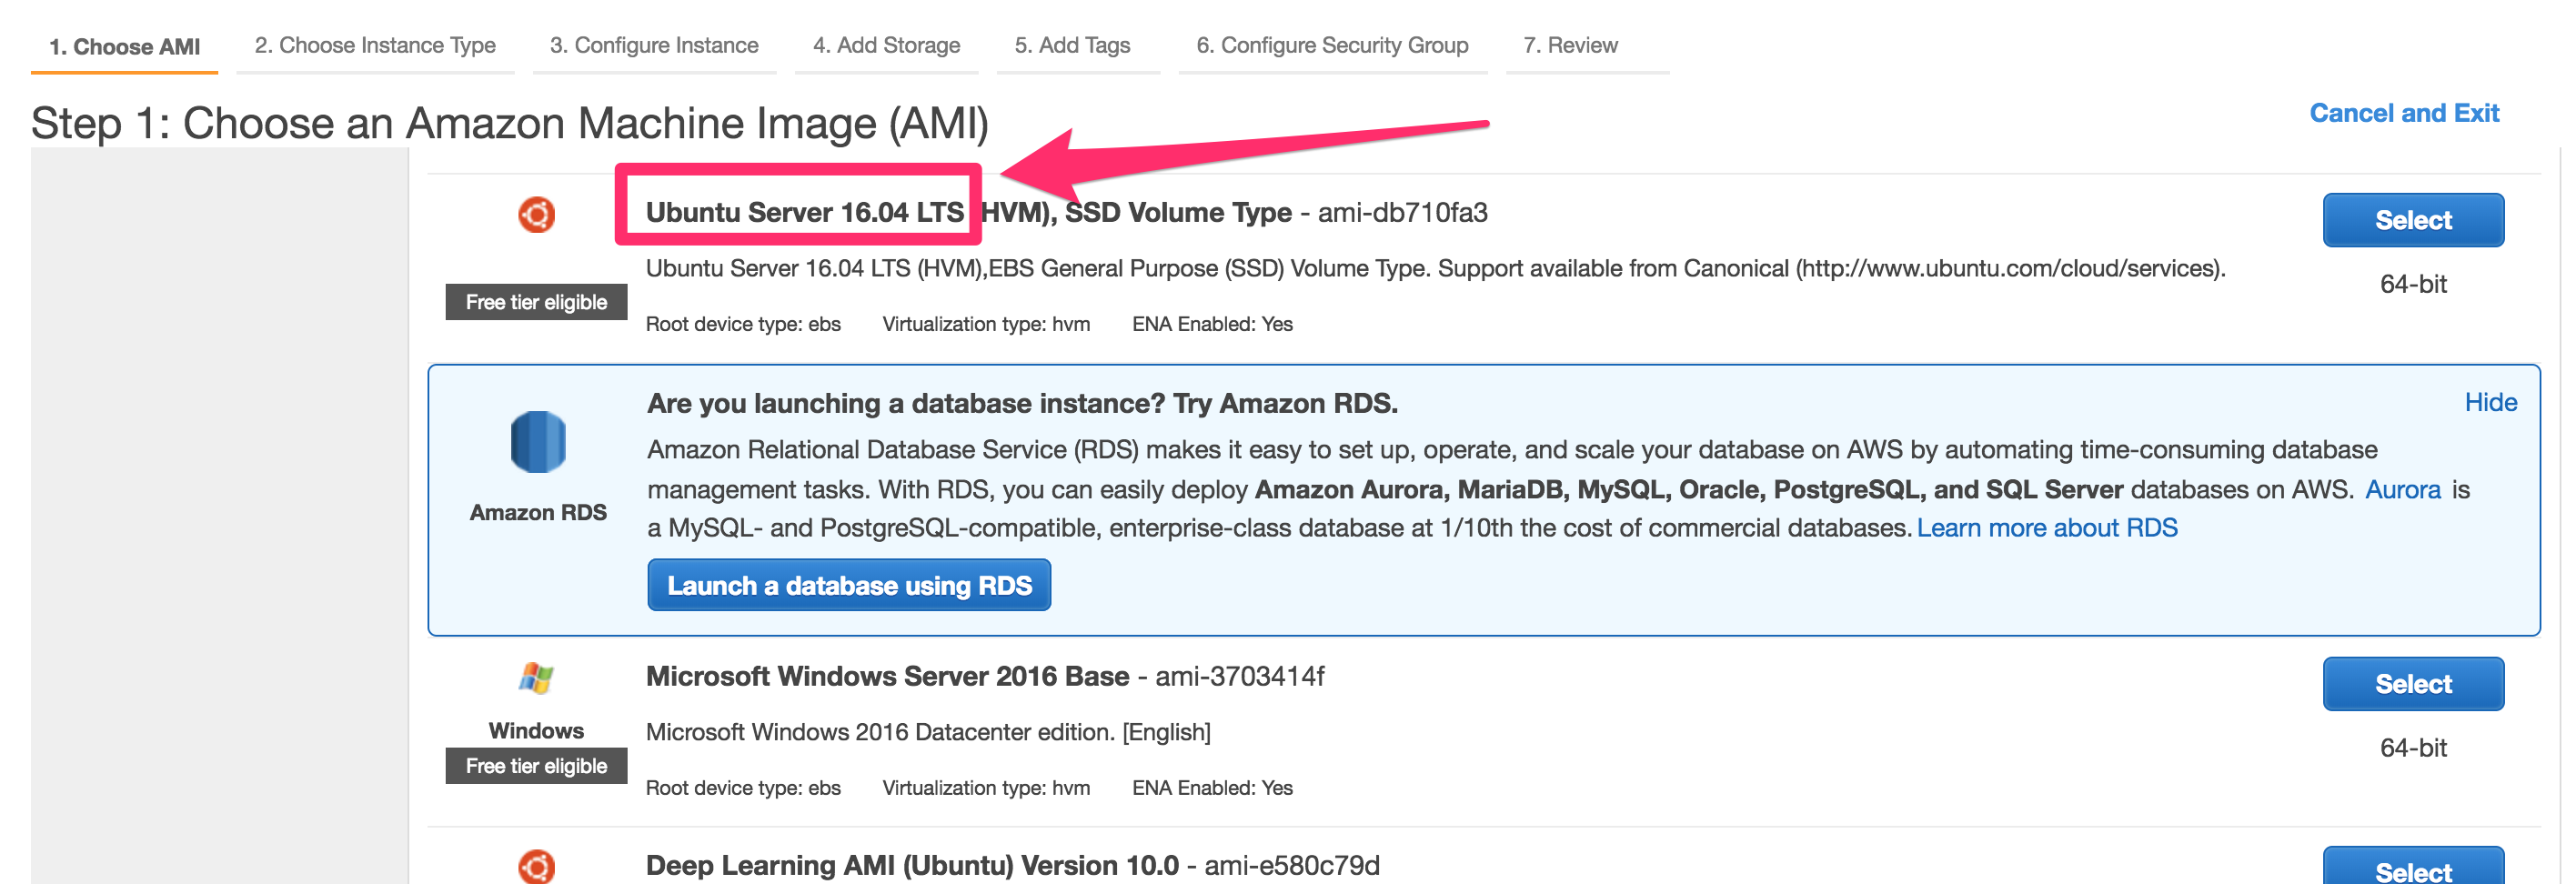
Choose the OS type you want then click Select
Choose the instances type you want, choose t2.micro for free then click Next: Configure Instance Details

Other steps leave as default
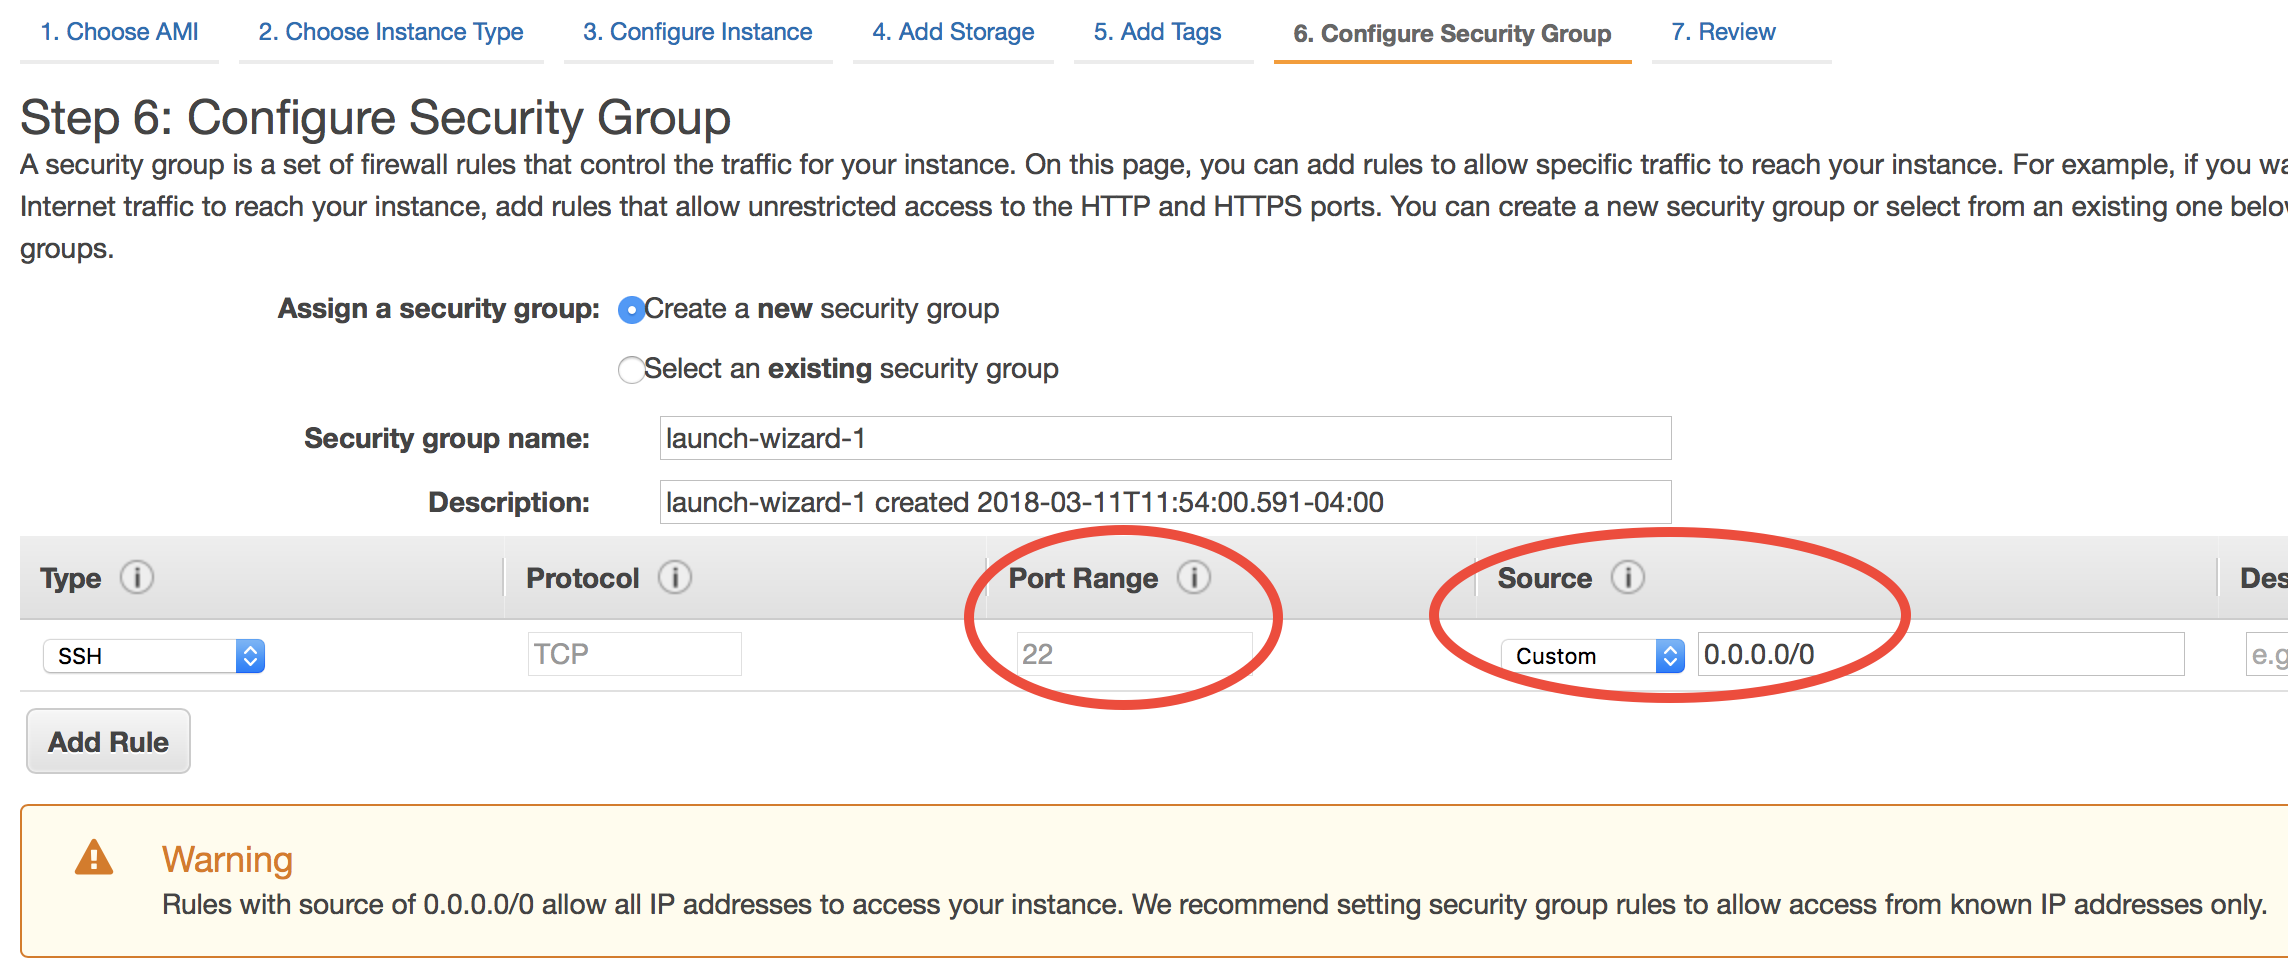
Create your own rules or leave as default

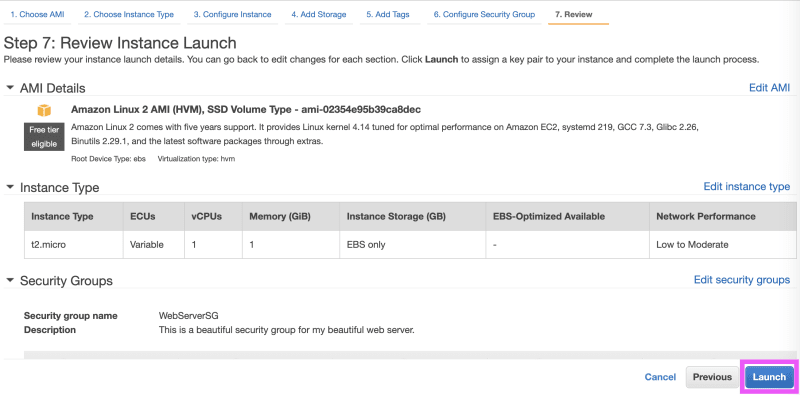
Review instance, if ok then launch it by clicking Launch
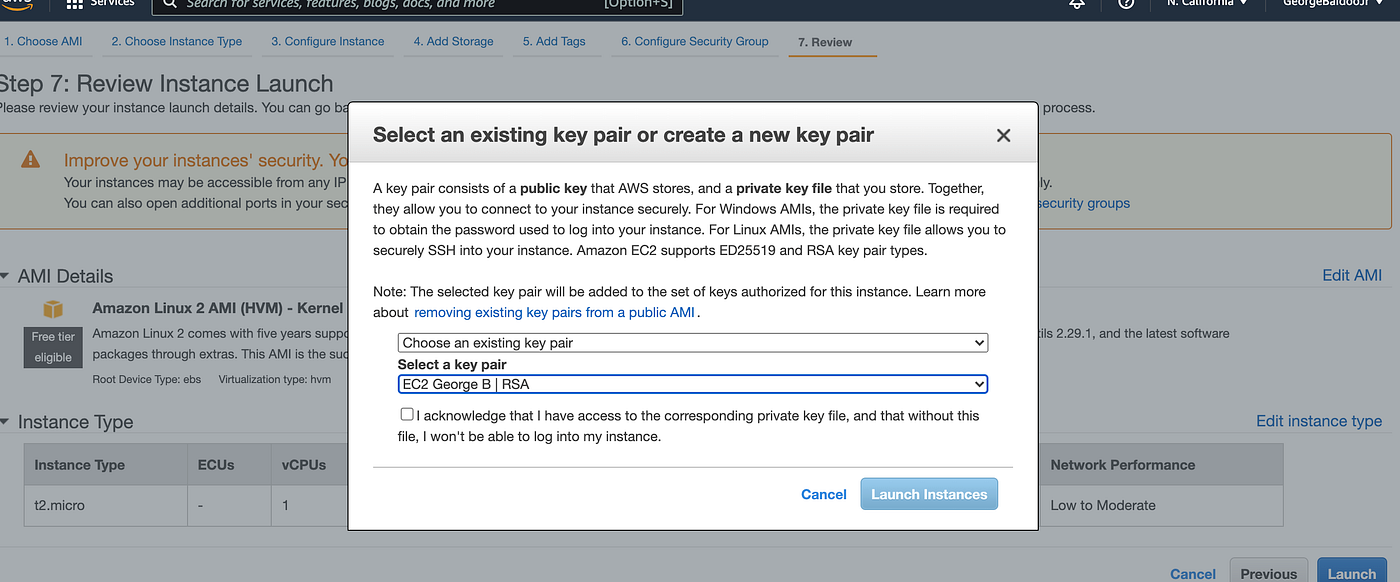
Key pair popup show up, you can create new key pair (use of ssh) or select an existing one then click Launch Instance
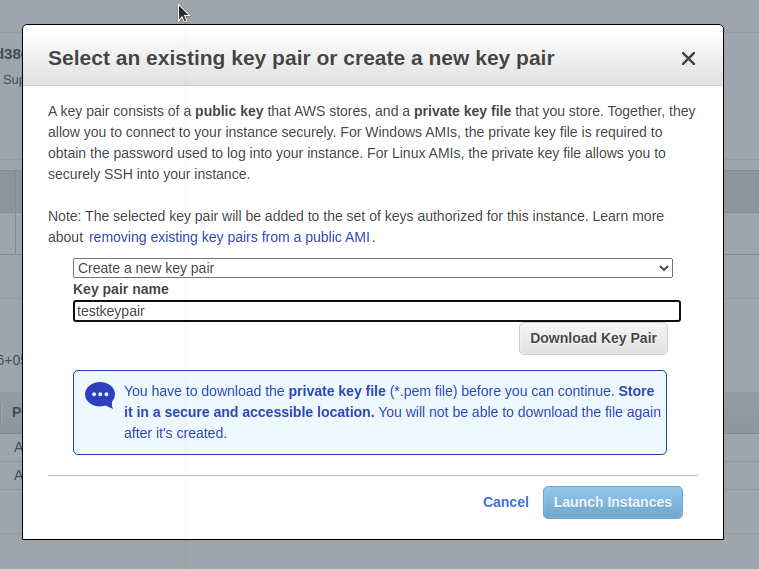
Go to https://console.aws.amazon.com/ec2 In the navigation pane, under Network & Security, choose Key Pairs then click Create key pair


Enter name for key pair, format select pem file

Check if macos enable ssh
sudo systemsetup -getremotelogin
The response look like this
Remote Login: On
Set 400 permission to pem file
chmod -R 400 /Users/trieungo/trieungo/cloud.devs.pem
Connect to aws
ssh -i /path/mypemfile.pem ubuntu@xxx.xx.xxx.xxx
# .pem file is key pair created in step 2
# ubuntu is ec2 instance username, default is ubuntu (if you launch ubuntu instance)
# xxx.xx.xxx.xxx is ip of ec2 instance
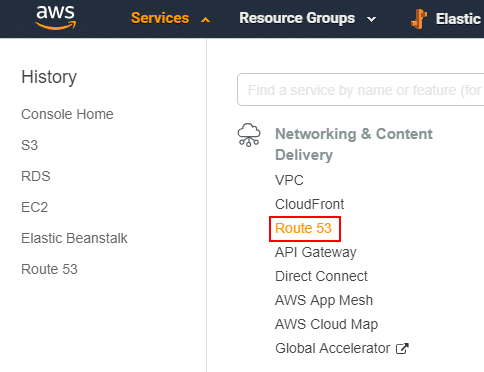
Click Services -> Route 53
Click Hosted zones

Click Create Hosted zone or select existing one. I’ll go for an existing one this time
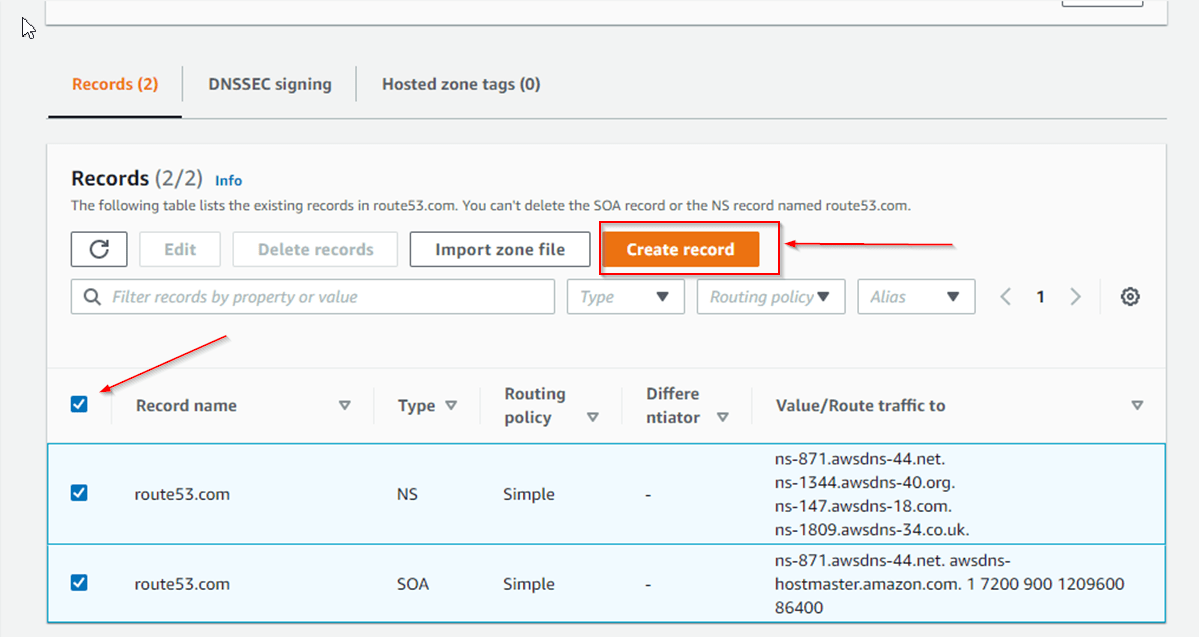
Then click Create record
Fill subdomain name, Public IPv4 DNS, of EC2 instance then click Create

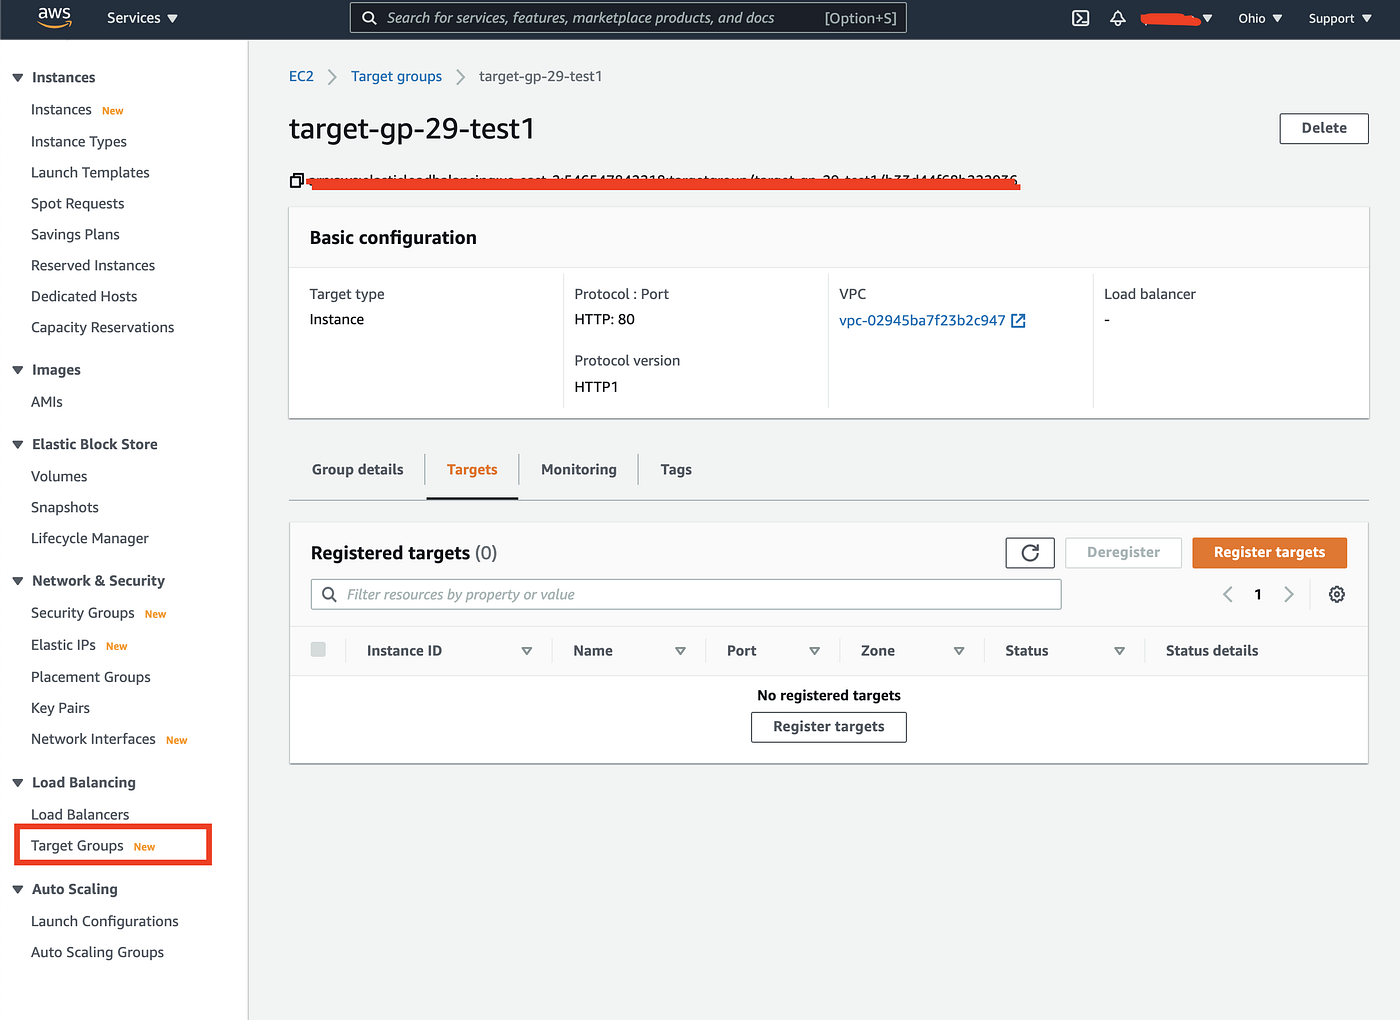
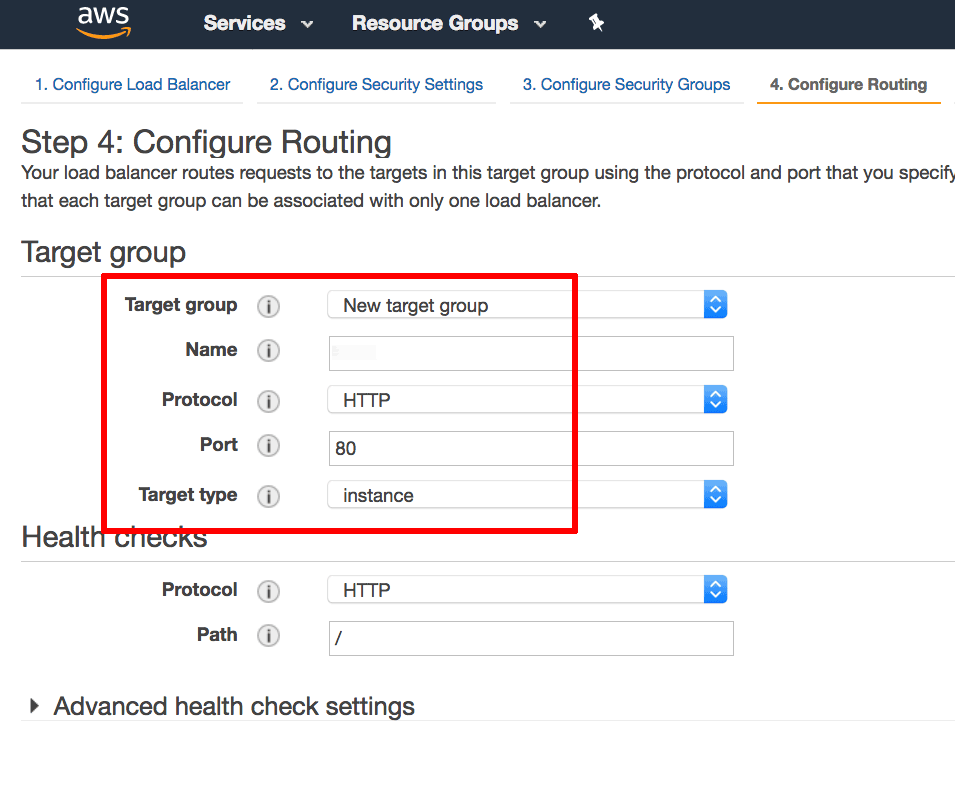
Go to Target Groups and click Create target group

Fill target group name, select VPC, the rest leave as default then click Next
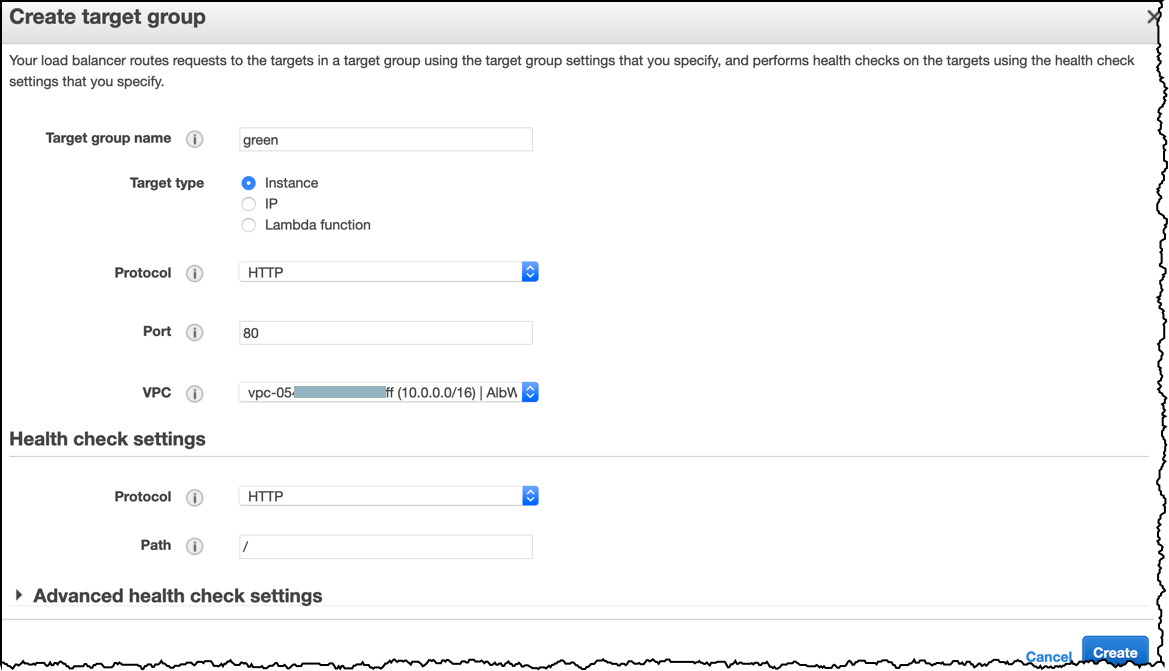
Select your EC2 instance then click Create target group

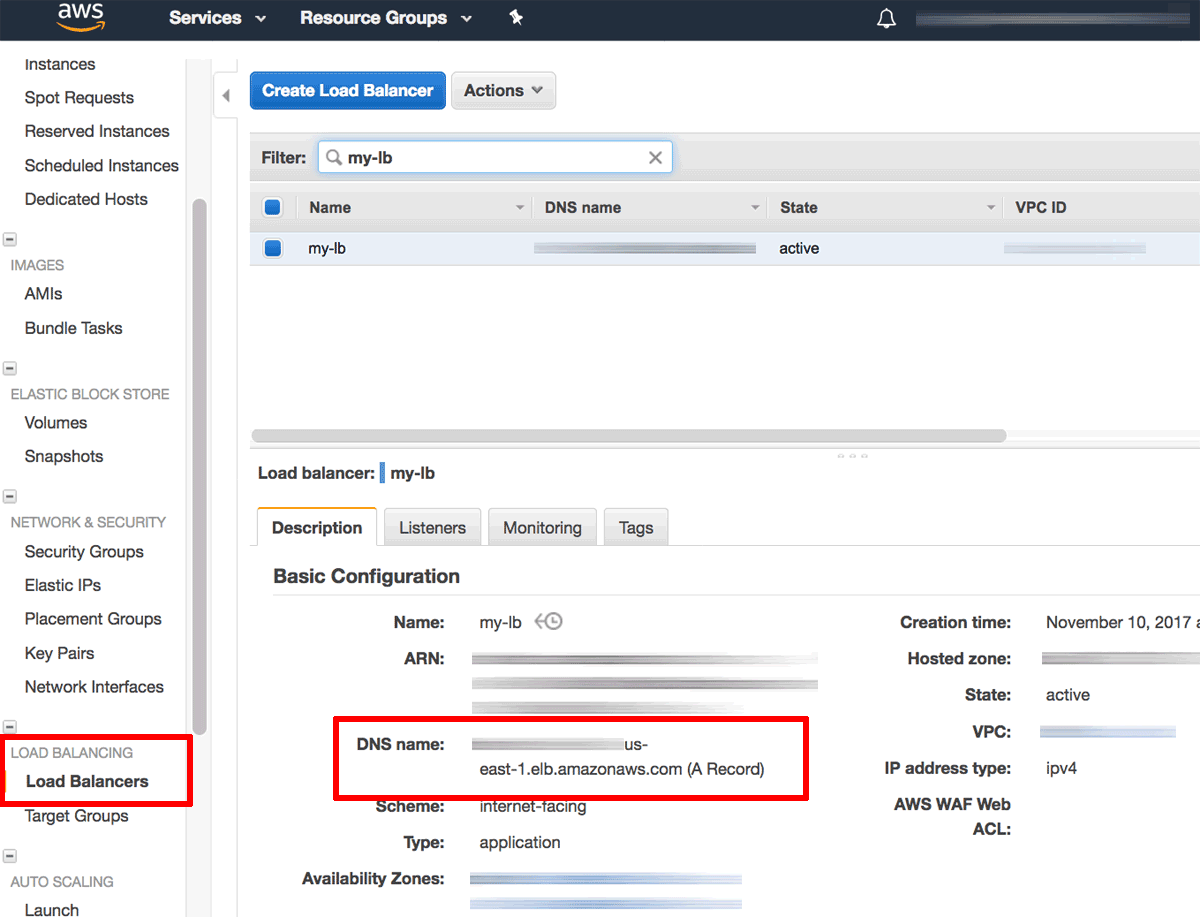
Go to Load balancer and click Create load balancer
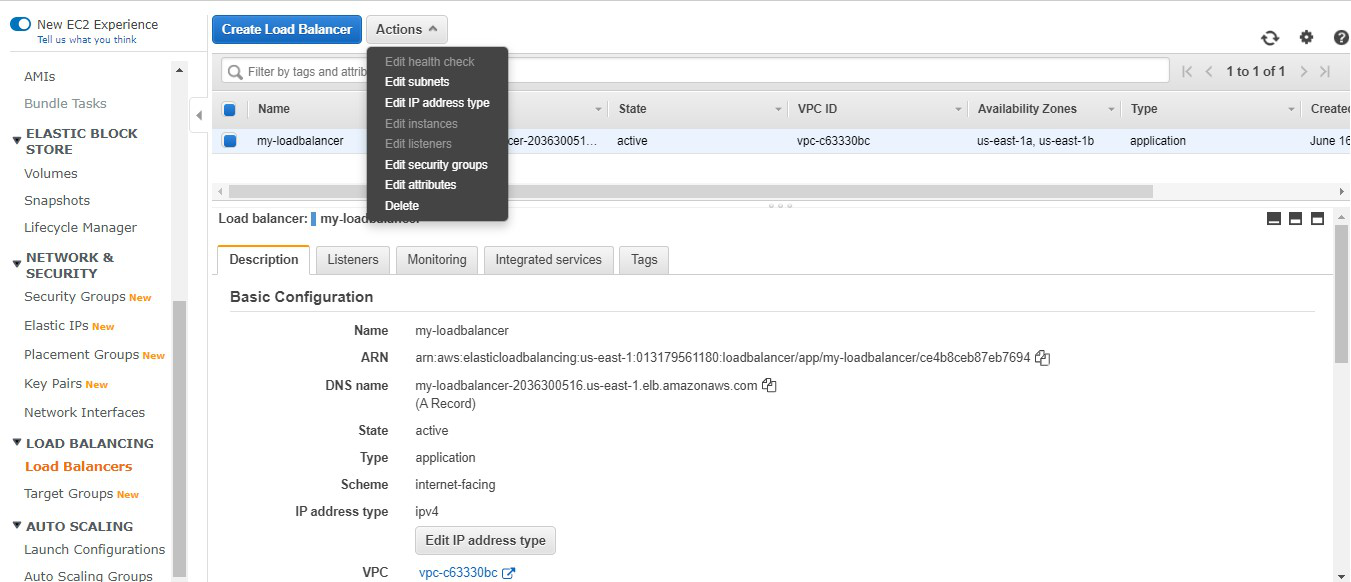
Select balancer type is application type

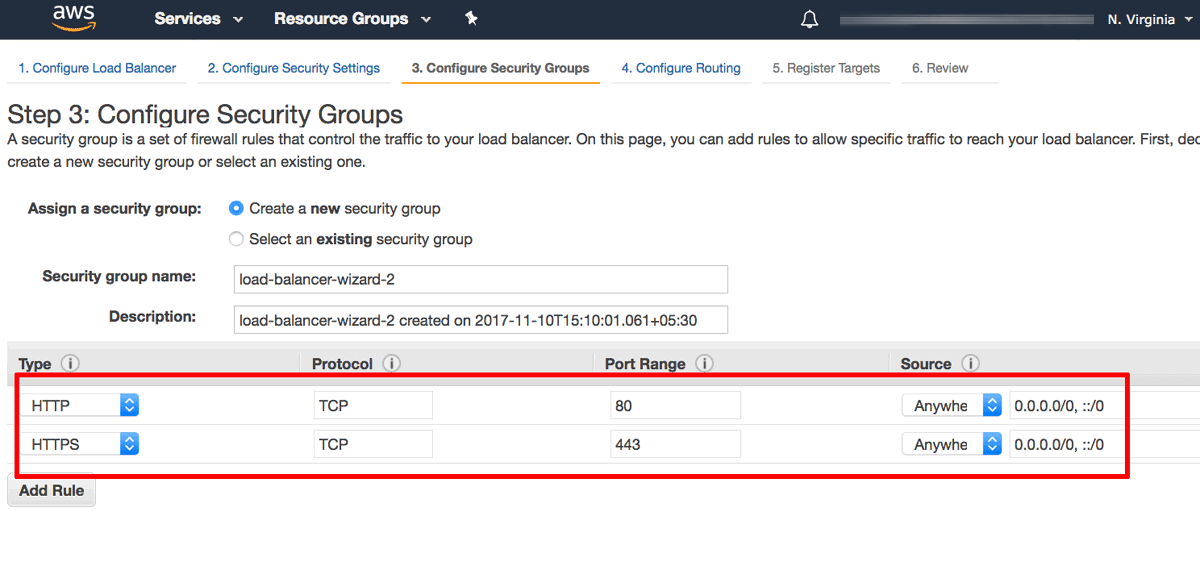
Fill load balancer, select VPC , security group and link to target group (Protocol choose HTTPS) and select SSL certificate then click create load balancer

Then go to load balancer detail / listener to add 80 for redirect from http - https
Fill port is 80, action select redirect, others leave as default
Wait until the load balancer status changes to active then you are good to go.
Go to your balancer and get DNS name
Go to your router 53, record type select CNAME, value replace with DNS name