Polygon is a decentralised Ethereum scaling platform that enables developers to build scalable user-friendly dApps with low transaction fees without ever sacrificing on security. Polygon's live blockchain in production is called Polygon Proof-of-Stake or PoS for short. In this guide, we'll learn how to build and deploy our first Solidity smart contracts to Polygon PoS.
- Speed The Polygon Network uses a high-throughput blockchain with consensus provided by a group of Block Producers selected by stakeholders at each checkpoint. A Proof of Stake layer is used to validate blocks and periodically post proofs of Block Producers to the Ethereum mainnet. This enables rapid block confirmation rates of about 2 seconds while preserving a high amount of decentralization, resulting in excellent throughput for the network.
- Scalability Polygon Network achieves a hypothetical transaction speed of fewer than 2 seconds on a single sidechain. Using multiple sidechains helps the network to handle millions of transactions per second. This mechanism (already demonstrated in the first Matic sidechain) allows the Polygon network to scale easily.
- Security Polygon's smart contracts rely on Ethereum’s security. To safeguard the network, it employs three critical security models. It uses Ethereum's staking management contracts and a group of incentivized validators running Heimdall and Bor nodes. Developers can also implement both models (Hybrid) into their dApp.
If you are an Ethereum developer, you are already a Polygon developer. Simply switch to the Polygon RPC and get started. All the tools you are familiar with on the Ethereum blockchain are supported on Polygon by default, such as Truffle, Remix, and Web3js.
You can deploy decentralized applications to either Polygon Mumbai Testnet or the Mainnet. The Polygon Mumbai Testnet connects with the Ethereum Goërli Testnet, which acts as its ParentChain. You can find all the network-related details in the network documentation.
To interact with the Polygon Network, you need to have an Ethereum-based wallet because Polygon runs on Ethereum Virtual Machine (EVM). You can choose to set up a Metamask or Arkane Wallet. More information on wallet-related details and why you need one can be found in our wallet documentation.
Polygon supports many services you can use to test, compile, debug, and deploy decentralized applications onto the Polygon Network. These include deployment using Alchemy, Chainstack, QuickNode, Remix, Truffle, Hardhat, and Replit.
You can add Polygon to Metamask or directly use Arkane, which allows you to connect to Polygon using RPC.
In order to connect with the Polygon network to read blockchain information, we recommend using the Alchemy SDK.
{
// Javascript
// Setup: npm install alchemy-sdk
const { Alchemy, Network } = require("alchemy-sdk");

const settings = {
  apiKey: "demo", // Can replace with your API Key from https://www.alchemy.com
  network: Network.MATIC_MAINNET, // Can replace with MATIC_MUMBAI
};

const alchemy = new Alchemy(settings);

async function main() {
  const latestBlock = await alchemy.core.getBlockNumber();
  console.log("The latest block number is", latestBlock);
}

main();
Polygon prides itself in being the ultimate Layer-2 scaling solution for Ethereum. You don't have to worry about the underlying architecture while moving or deploying your dApps to the Polygon Network as long as it is EVM-compatible. Use Polygon as a faster transaction layer: Deploying your dApp to the Polygon Mainnet allows you to leverage Polygon as a faster transaction layer for your dApp. Additionally, you can get your tokens mapped by us. If this is overwhelming, that’s alright! You can jump right into the action and start hacking with 3 solidity tutorials below. You’ve got this!
- A Proof of Work
- B Proof of Stake
- C Proof of Storage
- D Proof of Spacetime
🎫 Create a simple NFT to learn basics of Polygon PoS. You'll use 👷♀️ HardHat to compile and deploy smart contracts. Then, you'll use a template React app full of important Polygon components and hooks. Finally, you'll deploy an NFT to a public network to share with friends! 🚀
🌟 The final deliverable is an app that lets users purchase and transfer NFTs. Deploy your contracts to a testnet then build and upload your app to a public web server.
Required:
(yarn make sure you install yarn with npm i -g yarn or even sudo npm i -g yarn!)
git clone https://github.com/llsourcell/scaffold-eth-challenges.git challenge-0-simple-nftcd challenge-0-simple-nft
git checkout challenge-0-simple-nft
yarn install
yarn chainin a second terminal window, start your 📱 frontend:
cd challenge-0-simple-nft
yarn start
in a third terminal window, 🛰 deploy your contract:
cd challenge-0-simple-nft
yarn deploy
You can
yarn deploy --resetto deploy a new contract any time.
📱 Open http://localhost:3000 to see the app
⛽️ You'll need to get some funds from the faucet for gas.

🦊 At first, please don't connect MetaMask. If you already connected, please click logout:
🔥 We'll use burner wallets on localhost...
👛 Explore how burner wallets work by opening a new incognito window and navigate it to http://localhost:3000. You'll notice it has a new wallet address in the top right. Copy the incognito browsers' address and send localhost test funds to it from your first browser:

👨🏻🚒 When you close the incognito window, the account is gone forever. Burner wallets are great for local development but you'll move to more permanent wallets when you interact with public networks.
✏️ Mint some NFTs! Click the
MINT NFTbutton in the YourCollectables tab.

👀 You should see your collectibles start to show up:

👛 Open an incognito window and navigate to http://localhost:3000
🎟 Transfer an NFT to the incognito window address using the UI:

👛 Try to mint an NFT from the incognito window.
Can you mint an NFT with no funds in this address? You might need to grab funds from the faucet to pay the gas!
🕵🏻♂️ Inspect the Debug Contracts tab to figure out what address is the owner of YourCollectible?
🔏 You can also check out your smart contract YourCollectible.sol in packages/hardhat/contracts.
💼 Take a quick look at your deploy script 00_deploy_your_contract.js in packages/hardhat/deploy.
📝 If you want to make frontend edits, open App.jsx in packages/react-app/src.
🛰 Ready to deploy to a public testnet?!?
Change the
defaultNetworkinpackages/hardhat/hardhat.config.jstomumbai

🔐 Generate a deployer address with yarn generate

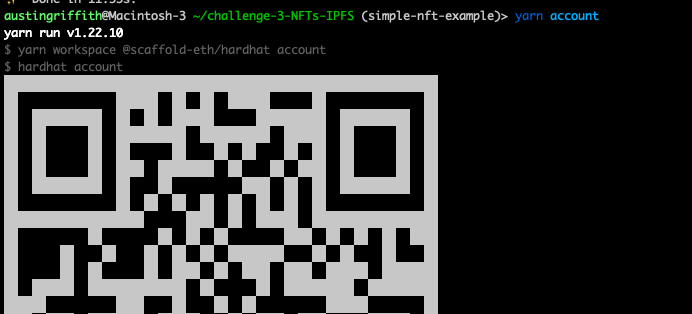
👛 View your deployer address using yarn account
⛽️ Use a faucet like https://faucet.polygon.technology/ or https://faucet.polygon.technology/ to fund your deployer address.
⚔️ Side Quest: Keep a 🧑🎤 punkwallet.io on your phone's home screen and keep it loaded with testnet eth. 🧙♂️ You'll look like a wizard when you can fund your deployer address from your phone in seconds.
🚀 Deploy your NFT smart contract:
yarn deploy💬 Hint: You can set the
defaultNetworkinhardhat.config.jstomumbaiOR you canyarn deploy --network mumbai.
✏️ Edit your frontend
App.jsxinpackages/react-app/srcto change thetargetNetworktoNETWORKS.mumbai:

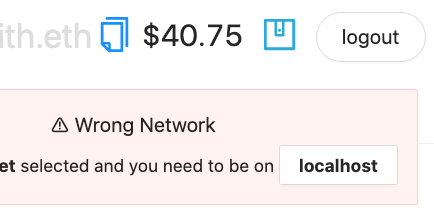
You should see the correct network in the frontend (http://localhost:3000):

🦊 At this moment, you will need to connect the dapp to a browser wallet where you have some ether available to mint tokens. Keep in mind that the address you generated in the previous step to deploy the contract will likely be different from the one you have configured in your wallet.
🎫 Ready to mint a batch of NFTs for reals? Use the MINT NFT button.

📦 Build your frontend:
yarn build💽 Upload your app to surge:
yarn surge(You could also yarn s3 or maybe even yarn ipfs?)
😬 Windows users beware! You may have to change the surge code in
packages/react-app/package.jsonto just"surge": "surge ./build",
⚙ If you get a permissions error yarn surge again until you get a unique URL, or customize it in the command line.
yarn test
Update the api-key in packages/hardhat/package.json file. You can get your key here.

Now you are ready to run the yarn verify --network your_network command to verify your contracts on etherscan 🛰
It is okay if it says your contract is already verified. Copy the address of YourCollectable.sol and search it on mumbai polygonscan to find the correct URL you need to submit this challenge.
👩❤️👨 Share your public url with a friend and ask them for their address to send them a collectible :)
- A Once
- B Never
- C Infinitely
- D Twice
A superpower of Polygon is allowing you, the builder, to create a simple set of rules that an adversarial group of players can use to work together. In this challenge, you create a decentralized application where users can coordinate a group funding effort. If the users cooperate, the money is collected in a second smart contract. If they defect, the worst that can happen is everyone gets their money back. The users only have to trust the code.
🏦 Build a
Staker.solcontract that collects ETH from numerous addresses using a payablestake()function and keeps track ofbalances. After somedeadlineif it has at least somethresholdof ETH, it sends it to anExampleExternalContractand triggers thecomplete()action sending the full balance. If not enough ETH is collected, allow users towithdraw().
🎛 Building the frontend to display the information and UI is just as important as writing the contract. The goal is to deploy the contract and the app to allow anyone to stake using your app. Use a
Stake(address,uint256)event to all stakes.
🌟 The final deliverable is deploying a Dapp that lets users send ether to a contract and stake if the conditions are met, then
yarn buildandyarn surgeyour app to a public webserver.
git clone https://github.com/llsourcell/scaffold-eth-challenges.git challenge-1-decentralized-staking

cd challenge-1-decentralized-staking

git checkout challenge-1-decentralized-staking

yarn install
🔏 Edit your smart contract Staker.sol in packages/hardhat/contracts
You'll have three terminals up for:
yarn start   (react app frontend)
yarn chain   (hardhat backend)
yarn deploy  (to compile, deploy, and publish your contracts to the frontend)
💻 View your frontend at http://localhost:3000/
👩💻 Rerun
yarn deploy --resetwhenever you want to deploy new contracts to the frontend.
You'll need to track individual balances using a mapping:
mapping ( address => uint256 ) public balances;And also track a constant threshold at 1 ether
uint256 public constant threshold = 1 ether;👩💻 Write your
stake()function and test it with theDebug Contractstab in the frontend
💸 Need more funds from the faucet? Enter your frontend address into the wallet to get as much as you need!

✏ Need to troubleshoot your code? If you import hardhat/console.sol to your contract, you can call console.log() right in your Solidity code. The output will appear in your yarn chain terminal.
- Do you see the balance of the
Stakercontract go up when youstake()? - Is your
balancecorrectly tracked? - Do you see the events in the
Staker UItab?
⚙️ Think of your smart contract like a state machine. First, there is a stake period. Then, if you have gathered the
thresholdworth of ETH, there is a success state. Or, we go into a withdraw state to let users withdraw their funds.
Set a deadline of block.timestamp + 30 seconds
uint256 public deadline = block.timestamp + 30 seconds;👨🏫 Smart contracts can't execute automatically, you always need to have a transaction execute to change state. Because of this, you will need to have an execute() function that anyone can call, just once, after the deadline has expired.
👩💻 Write your
execute()function and test it with theDebug Contractstab
Check the ExampleExternalContract.sol for the bool you can use to test if it has been completed or not. But do not edit the ExampleExternalContract.sol as it can slow the auto grading.
If the address(this).balance of the contract is over the threshold by the deadline, you will want to call: exampleExternalContract.complete{value: address(this).balance}()
If the balance is less than the threshold, you want to set a openForWithdraw bool to true and allow users to withdraw() their funds.
(You'll have 30 seconds after deploying until the deadline is reached, you can adjust this in the contract.)
👩💻 Create a
timeLeft()function includingpublic view returns (uint256)that returns how much time is left.
block.timestamp >= deadline you want to return 0;
⏳ The time will only update if a transaction occurs. You can see the time update by getting funds from the faucet just to trigger a new block.
👩💻 You can call
yarn deploy --resetany time you want a fresh contract
- Can you see
timeLeftcounting down in theStaker UItab when you trigger a transaction with the faucet? - If you
stake()enough ETH before thedeadline, does it callcomplete()? - If you don't
stake()enough can youwithdraw()your funds?
🎀 To improve the user experience, set your contract up so it accepts ETH sent to it and calls stake(). You will use what is called the receive() function.
Use the receive() function in solidity to "catch" ETH sent to the contract and call
stake()to updatebalances.
- If you send ETH directly to the contract address does it update your
balance?
- Can execute get called more than once, and is that okay?
- Can you stake and withdraw freely after the
deadline, and is that okay? - What are other implications of anyone being able to withdraw for someone?
- Make sure funds can't get trapped in the contract! Try sending funds after you have executed! What happens?
- Try to create a modifier called
notCompleted. It will check thatExampleExternalContractis not completed yet. Use it to protect yourexecuteandwithdrawfunctions.
- Now is a good time to run
yarn testto run the automated testing function. It will test that you hit the core checkpoints. You are looking for all green checkmarks and passing tests!
📡 Edit the defaultNetwork to your choice of public EVM networks in packages/hardhat/hardhat.config.js
👩🚀 You will want to run yarn account to see if you have a deployer address
🔐 If you don't have one, run yarn generate to create a mnemonic and save it locally for deploying.
⛽️ You will need to send ETH to your deployer address with your wallet.
📝 If you plan on submitting this challenge, be sure to set your
deadlineto at leastblock.timestamp + 72 hours
🚀 Run
yarn deployto deploy your smart contract to a public network (selected in hardhat.config.js)
📝 Edit the
targetNetworkinApp.jsx(inpackages/react-app/src) to be the public network where you deployed your smart contract.
💻 View your frontend at http://localhost:3000/
📡 When you are ready to ship the frontend app...
📦 Run yarn build to package up your frontend.
💽 Upload your app to surge with yarn surge (you could also yarn s3 or maybe even yarn ipfs?)
😬 Windows users beware! You may have to change the surge code in
packages/react-app/package.jsonto just"surge": "surge ./build",
⚙ If you get a permissions error yarn surge again until you get a unique URL, or customize it in the command line.
📝 you will use this deploy URL to submit to SpeedRunEthereum.com.
🚔 Traffic to your url might break the Infura rate limit, edit your key: constants.js in packages/ract-app/src.
Update the api-key in packages/hardhat/package.json file. You can get your key here.
Now you are ready to run the
yarn verify --network your_networkcommand to verify your contracts on etherscan 🛰
- A Developer access to test tokens
- B Free Money
- C No reason
- D Costs money
🤖 Smart contracts are kind of like "always on" vending machines that anyone can access. Let's make a decentralized, digital currency. Then, let's build an unstoppable vending machine that will buy and sell the currency. We'll learn about the "approve" pattern for ERC20s and how contract to contract interactions work.
🏵 Create
YourToken.solsmart contract that inherits the ERC20 token standard from OpenZeppelin. Set your token to_mint()1000 (* 10 ** 18) tokens to themsg.sender. Then create aVendor.solcontract that sells your token using a payablebuyTokens()function.
🎛 Edit the frontend that invites the user to
<input\>an amount of tokens they want to buy. We'll display a preview of the amount of ETH (or USD) it will cost with a confirm button.
🔍 It will be important to verify your token's source code in the block explorer after you deploy. Supporters will want to be sure that it has a fixed supply and you can't just mint more.
🧫 Everything starts by ✏️ Editing YourToken.sol in packages/hardhat/contracts
git clone https://github.com/scaffold-eth/scaffold-eth-challenges challenge-2-token-vendor
cd challenge-2-token-vendor
git checkout challenge-2-token-vendor
yarn install
🔏 Edit your smart contract YourToken.sol in packages/hardhat/contracts
You'll have three terminals up for:
yarn chain   (hardhat backend)
yarn start   (react app frontend)
yarn deploy  (to compile, deploy, and publish your contracts to the frontend)
👀 Visit your frontend at http://localhost:3000
👩💻 Rerun
yarn deploy --resetwhenever you want to deploy new contracts to the frontend.
ignore any warnings, we'll get to that...
👩💻 Edit
YourToken.solto inherit the ERC20 token standard from OpenZeppelin
Mint 1000 (* 10 ** 18) to your frontend address using the
constructor().
(Your frontend address is the address in the top right of http://localhost:3000)
You can
yarn deploy --resetto deploy your contract until you get it right.
- Can you check the
balanceOf()your frontend address in the YourToken of theDebug Contractstab? - Can you
transfer()your token to another account and check that account'sbalanceOf?
(Use an incognito window to create a new address and try sending to that new address. Use the transfer() function in the Debug Contracts tab.)
👩💻 Edit the
Vendor.solcontract with a payablebuyTokens()function
Use a price variable named tokensPerEth set to 100:
uint256 public constant tokensPerEth = 100;📝 The
buyTokens()function inVendor.solshould usemsg.valueandtokensPerEthto calculate an amount of tokens toyourToken.transfer()tomsg.sender.
📟 Emit event
BuyTokens(address buyer, uint256 amountOfETH, uint256 amountOfTokens)when tokens are purchased.
Edit deploy/01_deploy_vendor.js to deploy the Vendor (uncomment Vendor deploy lines).
- When you try to buy tokens from the vendor, you should get an error: 'ERC20: transfer amount exceeds balance'
⚔️ Side Quest: send tokens from your frontend address to the Vendor contract address and then try to buy them.
✏️ We can't hard code the vendor address like we did above when deploying to the network because we won't know the vendor address at the time we create the token contract.
✏️ So instead, edit
YourToken.solto mint the tokens to themsg.sender(deployer) in the constructor().
✏️ Then, edit
deploy/01_deploy_vendor.jsto transfer 1000 tokens tovendor.address.
await yourToken.transfer( vendor.address, ethers.utils.parseEther("1000") );You can
yarn deploy --resetto deploy your contract until you get it right.
(You will use the YourToken UI tab and the frontend for most of your testing. Most of the UI is already built for you for this challenge.)
- Does the
Vendoraddress start with abalanceOf1000 inYourTokenon theDebug Contractstab? - Can you buy 10 tokens for 0.1 ETH?
- Can you transfer tokens to a different account?
📝 Edit
Vendor.solto inherit Ownable.
In deploy/01_deploy_vendor.js you will need to call transferOwnership() on the Vendor to make your frontend address the owner:
await vendor.transferOwnership("**YOUR FRONTEND ADDRESS**");- Is your frontend address the
ownerof theVendor?
📝 Finally, add a
withdraw()function inVendor.solthat lets the owner withdraw ETH from the vendor.
- Can only the
ownerwithdraw the ETH from theVendor?
- Can anyone withdraw? Test everything!
- What if you minted 2000 and only sent 1000 to the
Vendor?
👩🏫 The hardest part of this challenge is to build your Vendor to buy the tokens back.
🧐 The reason why this is hard is the approve() pattern in ERC20s.
😕 First, the user has to call approve() on the YourToken contract, approving the Vendor contract address to take some amount of tokens.
🤨 Then, the user makes a second transaction to the Vendor contract to sellTokens(uint256 amount).
🤓 The Vendor should call yourToken.transferFrom(msg.sender, address(this), theAmount) and if the user has approved the Vendor correctly, tokens should transfer to the Vendor and ETH should be sent to the user.
📝 Edit
Vendor.soland add asellTokens(uint256 amount)function!
approve() before calling sellTokens(uint256 amount).
🔨 Use the Debug Contracts tab to call the approve and sellTokens() at first but then...
🔍 Look in the App.jsx for the extra approve/sell UI to uncomment!
- Can you sell tokens back to the vendor?
- Do you receive the right amount of ETH for the tokens?
- Should we disable the
ownerwithdraw to keep liquidity in theVendor? - It would be a good idea to display Sell Token Events. Create the
eventandemitit in yourVendor.soland look atbuyTokensEventsin yourApp.jsxfor an example of how to update your frontend.
- Now is a good time to run
yarn testto run the automated testing function. It will test that you hit the core checkpoints. You are looking for all green checkmarks and passing tests!
📡 Edit the defaultNetwork in packages/hardhat/hardhat.config.js, as well as targetNetwork in packages/react-app/src/App.jsx, to your choice of public EVM networks
👩🚀 You will want to run yarn account to see if you have a deployer address.
🔐 If you don't have one, run yarn generate to create a mnemonic and save it locally for deploying.
🛰 Use a faucet like faucet.paradigm.xyz to fund your deployer address (run yarn account again to view balances)
🚀 Run
yarn deployto deploy to your public network of choice (😅 wherever you can get ⛽️ gas)
🔬 Inspect the block explorer for the network you deployed to... make sure your contract is there.
📦 Run yarn build to package up your frontend.
💽 Upload your app to surge with yarn surge (you could also yarn s3 or maybe even yarn ipfs?)
😬 Windows users beware! You may have to change the surge code in
packages/react-app/package.jsonto just"surge": "surge ./build",
⚙ If you get a permissions error yarn surge again until you get a unique URL, or customize it in the command line.
🚔 Traffic to your url might break the Infura rate limit, edit your key: constants.js in packages/react-app/src.
Update the api-key in packages/hardhat/package.json. You can get your key here.
Now you are ready to run the
yarn verify --network your_networkcommand to verify your contracts on etherscan 🛰
👀 You may see an address for both YouToken and Vendor. You will want the Vendor address.
- A W3C
- B Ethereum
- C Mozilla
- D Brave