There are excellent tutorials to build QuantLib in Windows using Visual Studio 2017. However, in Visual Studio 2019, there are some updates that slightly changes the building process. I follow the procedure in the link above and explored how to adapt to the changes in Visual Studio 2019. The main issue is that Visual Studio 2019 no longer automatically add user property sheets to all projects. Hence, we have to create a property sheet manually and then add it to all projects.
- Download boosts
boost_1_75_0.zipfrom here and unzip intoC:\local\ - Run
C:\local\boost_1_75_0\tools\build\bootstrap.batto getb2.exe - Copy
b2.exetoC:\local\boost_1_75_0\usingcopy b2.exe ..\.. - Run
C:\local\boost_1_75_0\b2.exe. After that, the following should be displayed:
- Download the Visual Studio Installer from here.
- In "Workloads", select "Desktop Development with C++". On the right-hand side, I use the default selection and add "MSVC v141 - VS 2017 C++ x64/x86 build tools" and "MSVC v140 - VS 2015 C++ build tools" for other projects (I don't think de-selecting the two will affect the process).
- Download QuantLib
QuantLib-1.20.zipfrom here and unzip intoC:\local\. - Open
C:\local\QuantLib-1.20\QuantLib.slnusing Visual Studio 2019 Community. - Choose "Release" and "Win32".
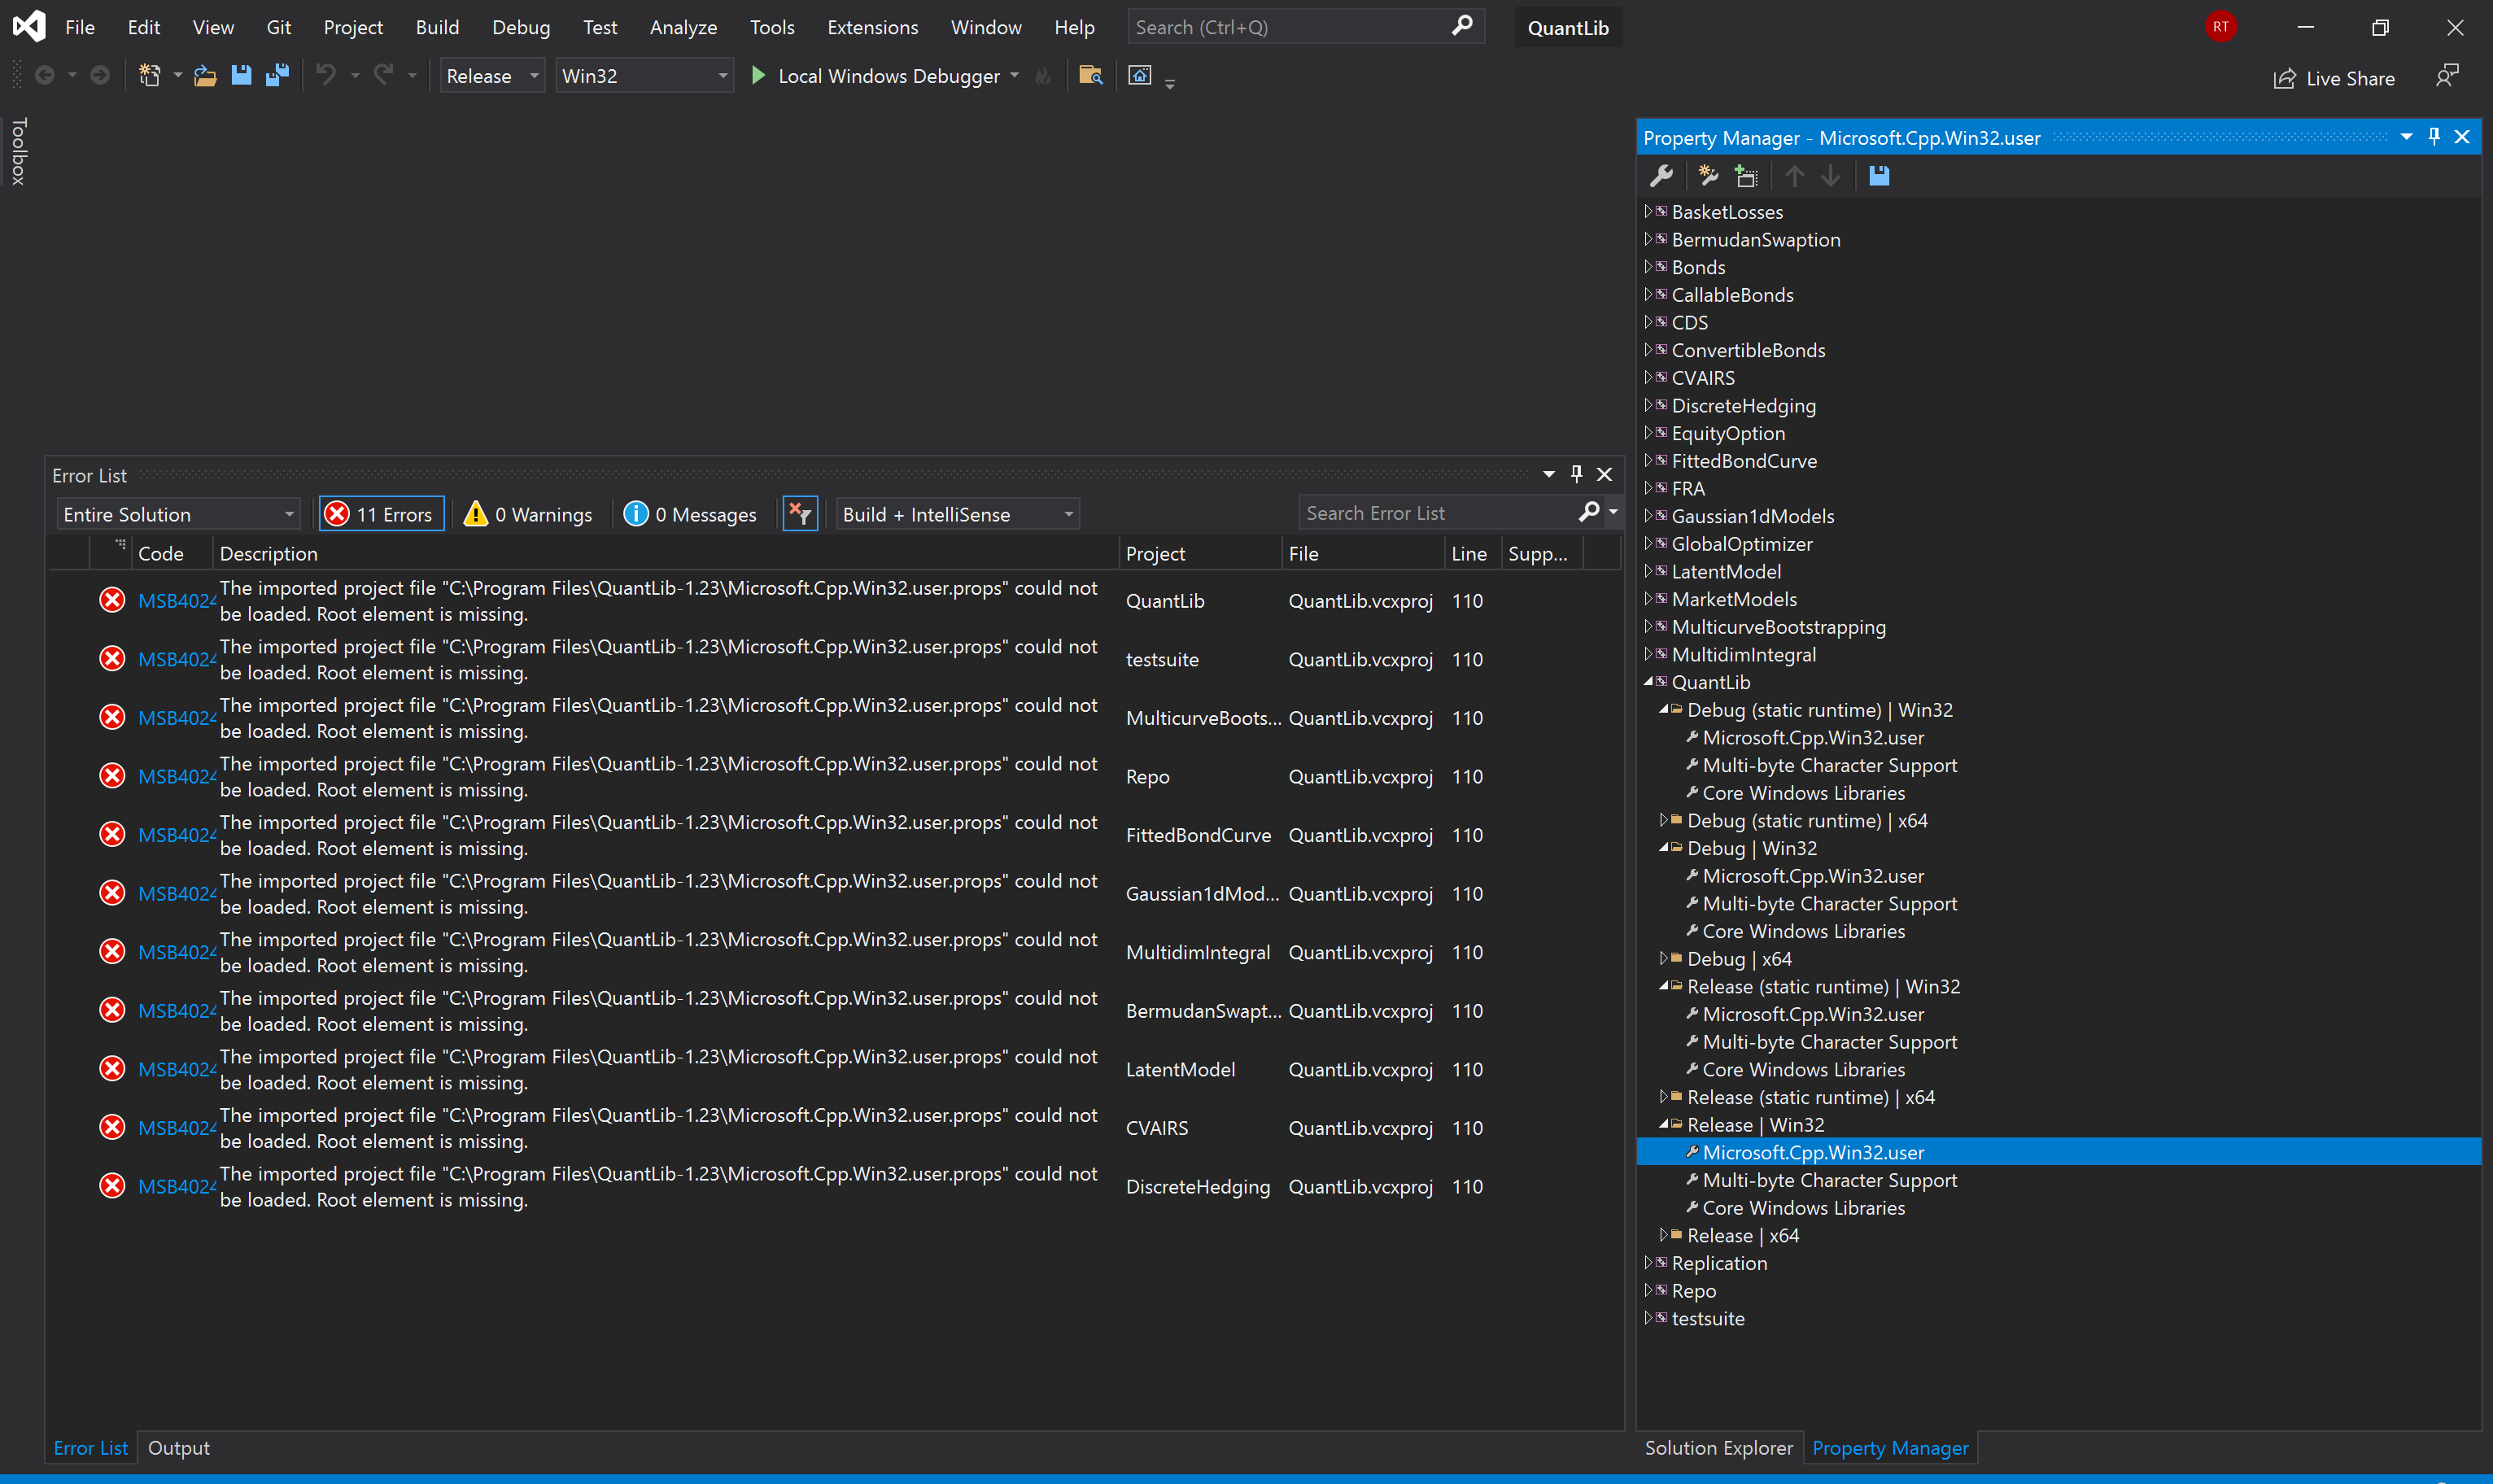
- Open Property Manager (View - Other Windows - Property Manager). Then you find that
Microsoft.Cpp.Win32.useris not under the Win32 subitems of the project QuantLib or other projects, but we can create it ourselves. - Under the project QuantLib, right-click on "Debug (static runtime) | Win32" and select "Add New Project Property Sheets".
- In the pop-up window, use file name
Microsoft.Cpp.Win32.user.props(or other named) and save atC:\local\QuantLib-1.20\. Now you can see the property sheet "Microsoft.Cpp.Win32.user" under "Debug (static runtime) | Win32". - Right-click on "Microsoft.Cpp.Win32.user" and select "Properties".
- Under "VC++ Directories", add
C:\local\boost_1_75_0to "Include Directories" and addC:\local\boost_1_75_0\stage\libto "Library Directories" (Per the instruction after building boost, the library directory is notC:\local\boost_1_75_0\libs, which actually contains source codes, not compiled.libfiles.) - Add
BOOST_CONFIG_SUPPRESS_OUTDATED_MESSAGEto "C/C++ - Preprocessor - Preprocessor Definitions" to suppress warnings. - Under "C/C++ - General - SDL checks", choose "No (/sdl-)".
- Then, add the newly created property sheet to the other subitems as well: "Debug | Win32", "Release (static runtime) | Win32", and "Release | Win32" by right-clicking on it, selecting "Add Existing Property Sheet", and choosing
Microsoft.Cpp.Win32.user.propsone-by-one (or selecting the three holdingCtrland add at one time). We can check that the directories are already included for the new three ones. Also since we are adding the existing property sheet, we only need to select one of them to make changes and the change will be applied automatically to all four. - Now, we have added the newly created property sheet to the project QuantLib, but they are not automatically added to the other projects. Hence, we have to manually add it to the four Win32 subitems of each project displayed in the Property Manager using the same procedure as the one above. We can add all at a time by selecting all Win32 subitems using
Ctrl. After that, all Win32 subitems of all projects should contain the property sheet as shown below:
- Back to "Solution Explorer", right-click on the Solution and choose "Build Solution". It will take a while and should display
21 succeeded, 0 failed, 0 skippedafter building.
https://www.boost.org/doc/libs/1_75_0/more/getting_started/windows.html
https://www.quantlib.org/install/vc10.shtml
https://benjaminwhiteside.com/2018/12/02/building-quantlib-in-vs2017/
I tried these steps exactly (2 times) but I am still getting the below error
