- Export a QR code from Google Authenticator
- Open the Google Authenticator Android app
- Tap ☰ › Transfer accounts › Export accounts
- Laboriously deselect all accounts except the one you want to export
- Tap Next
- Decode the
otpauth-migrationURI from the QR code- Take a screenshot of the QR code on the screen by holding Power+Volume Down
- Open the screenshot in Google Photos or another app that can decode QR codes
Ben Hutchison Aldaviva
🆒
Aldaviva
/ oauth-totp-google-authenticator-export-keepass-import.md
Last active
September 14, 2024 23:19
Export OAuth one-time passwords from Google Authenticator and import them into KeePass
Aldaviva
/ cipher-suites.md
Last active
August 21, 2024 07:12
Windows Server TLS cipher suites for A ranking on Qualys SSL Labs SSL Test
📃 Edit using gpedit.msc › Computer Configuration > Administrative Templates › Network > SSL Configuration Settings > SSL Cipher Suite Order.
🅰 These cipher suites will grant you an A+ ranking on Qualys SSL Labs SSL Server Test and testssl.sh.
⚡ Changes require a reboot to take effect.
🍦 Default cipher suite orders are listed on Microsoft Learn for Server 2019, [Server 2022](https://learn.microsoft.com/en-us/windows/win32/secauthn/tls-cipher-suites-in-wi
This file contains bidirectional Unicode text that may be interpreted or compiled differently than what appears below. To review, open the file in an editor that reveals hidden Unicode characters.
Learn more about bidirectional Unicode characters
| sudo mkdir -p /mnt/aegir | |
| sudo mount -t cifs -o username=ben,uid=ben //aegir.aldaviva.com/Ben /mnt/aegir |
Aldaviva
/ wmp_h.265_hevc.md
Last active
September 6, 2024 17:44
Play H.265/HEVC videos in Windows Media Player (Classic) without a third-party codec pack or media player. Tested using Microsoft.HEVCVideoExtension_2.0.60091.0_x64__8wekyb3d8bbwe with WMP 12.0.20348.1311 on Windows Server 2022 21H2 and 12.0.22621.1105 on Windows 11 22H2.
- Go to https://store.rg-adguard.net.
- Search for the HEVC Video Extensions from Device Manufacturer (
Microsoft.HEVCVideoExtension) app by entering the following store URL.https://www.microsoft.com/en-us/p/hevc-video-extensions-from-device-manufacturer/9n4wgh0z6vhq- Do not use the normal HEVC Video Extensions app URL, because that can't play HEVC videos in Windows Media Player for some inscrutable reason.
- Download the x64 appx file, or whatever your Windows architecture is.
- You may have to right click › Save Link As because the URL scheme is http, not https, if your browser is set to enforce HTTPS-only mode.
- If it tries to save as a filename that's just a GUID, you may copy the correct .appx filename and save it as that instead.
Aldaviva
/ lines-of-code.sh
Created
January 18, 2023 09:36
Count non-whitespace lines of code in a directory
This file contains bidirectional Unicode text that may be interpreted or compiled differently than what appears below. To review, open the file in an editor that reveals hidden Unicode characters.
Learn more about bidirectional Unicode characters
| grep --include '*.js' --recursive --invert-match --line-regexp --count --exclude-dir='lib' --exclude-dir='thirdparty' --exclude-dir='vendor' '\s*' . | awk -F : '{ sum += $2 } END { print sum }' |
Aldaviva
/ install-dotnet
Last active
June 15, 2022 15:51
Install the ASP.NET Core runtime machine-wide on a Raspberry Pi, where packages are unavailable and you normally have to fuck around with arguments and symlinks
This file contains bidirectional Unicode text that may be interpreted or compiled differently than what appears below. To review, open the file in an editor that reveals hidden Unicode characters.
Learn more about bidirectional Unicode characters
| #!/bin/sh | |
| SCRIPT_FILE=/root/dotnet-install.sh | |
| INSTALLATION_DIR=/usr/share/dotnet | |
| sudo rm -f $SCRIPT_FILE | |
| echo Downloading installation script | |
| sudo wget -q https://dot.net/v1/dotnet-install.sh -O $SCRIPT_FILE | |
| sudo chmod o+x $SCRIPT_FILE |
This file contains bidirectional Unicode text that may be interpreted or compiled differently than what appears below. To review, open the file in an editor that reveals hidden Unicode characters.
Learn more about bidirectional Unicode characters
| import xapi from 'xapi'; | |
| const cameraBrightnessCheckboxWidgetId = "camera_brightness_checkbox"; | |
| const brightnessModeConfiguration = xapi.Config.Cameras.Camera["1"].Brightness.Mode; | |
| brightnessModeConfiguration.on(renderBrightnessCheckbox); | |
| render(); | |
| async function render(){ | |
| return renderBrightnessCheckbox(await brightnessModeConfiguration.get()); |
Aldaviva
/ Retrospect.md
Last active
May 14, 2022 03:27
Retrospect is annoying, slow, and broken, but I know how to use it
- Restore
- Advanced Mode
- Restore an entire volume
- Pick the Source snapshot and wait for it to finish matching
- For the Destination, pick any drive (it won't be overwritten) and create a new Subvolume in it (it's just a new subdirectory which will contain the restored files)
- Change the restore method to Restore Missing Files Only
- In Files Chosen, deselect the root drive so that there are 0 files chosen
- In Options → More Choices → Windows → System, ensure Restore System State is checked. I also disabled Restore Security Information because registry hive files have very restrictive permissions by default, which makes them harder to work with while restoring.
- Restore
Aldaviva
/ Installing Vivaldi extensions manually.md
Last active
March 22, 2022 07:35
Manually install a packed Chromium extension CRX file into Vivaldi not from the Chrome Web Store
- Go to
vivaldi://extensions/ - Temporarily enable Developer mode
- Drag and drop the CRX file into the Extensions page
- If the drop target does not work, try entering
vivaldi://extensions/into the URL bar once again - Accept the confirmation prompt to install the extension
- Turn off Developer mode if it was off before you started
Aldaviva
/ Electrical connectors.md
Last active
July 16, 2023 23:01
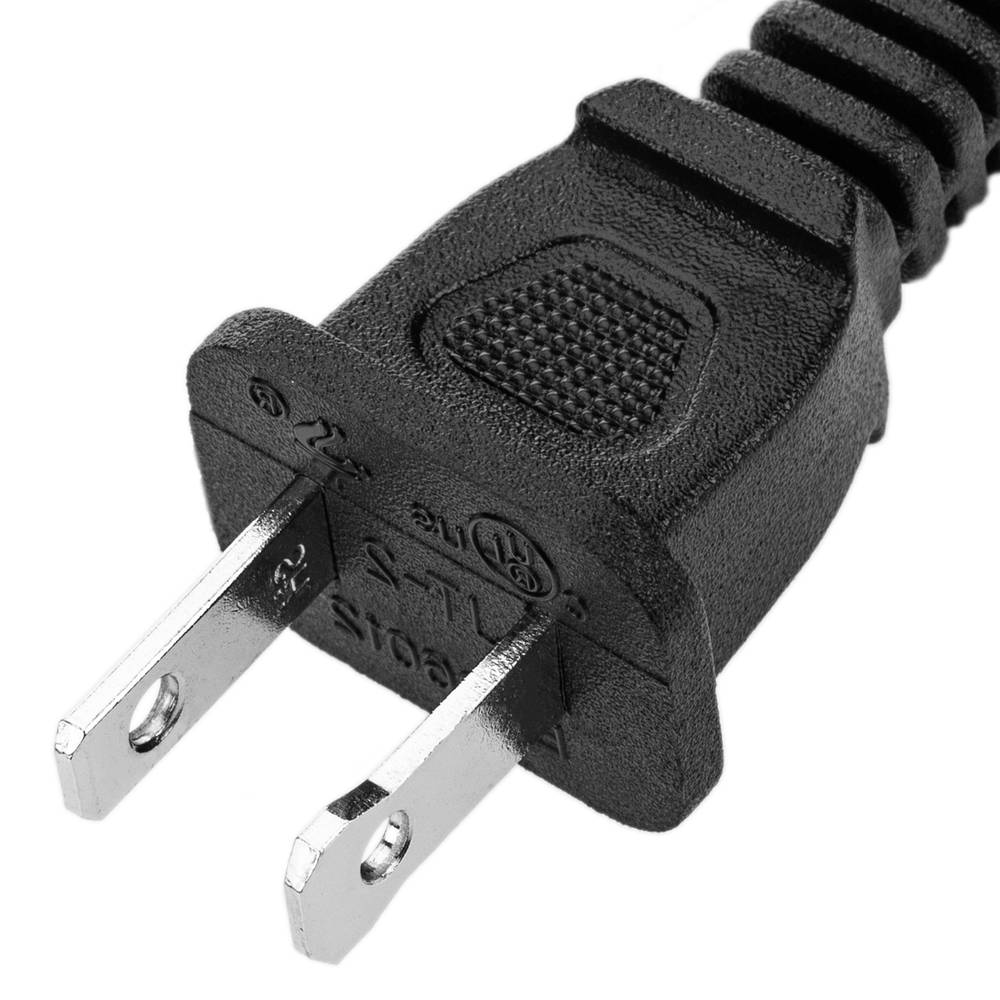
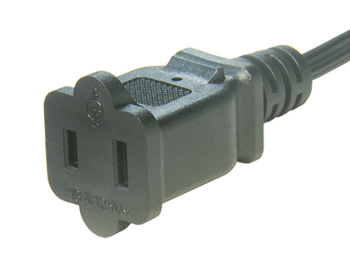
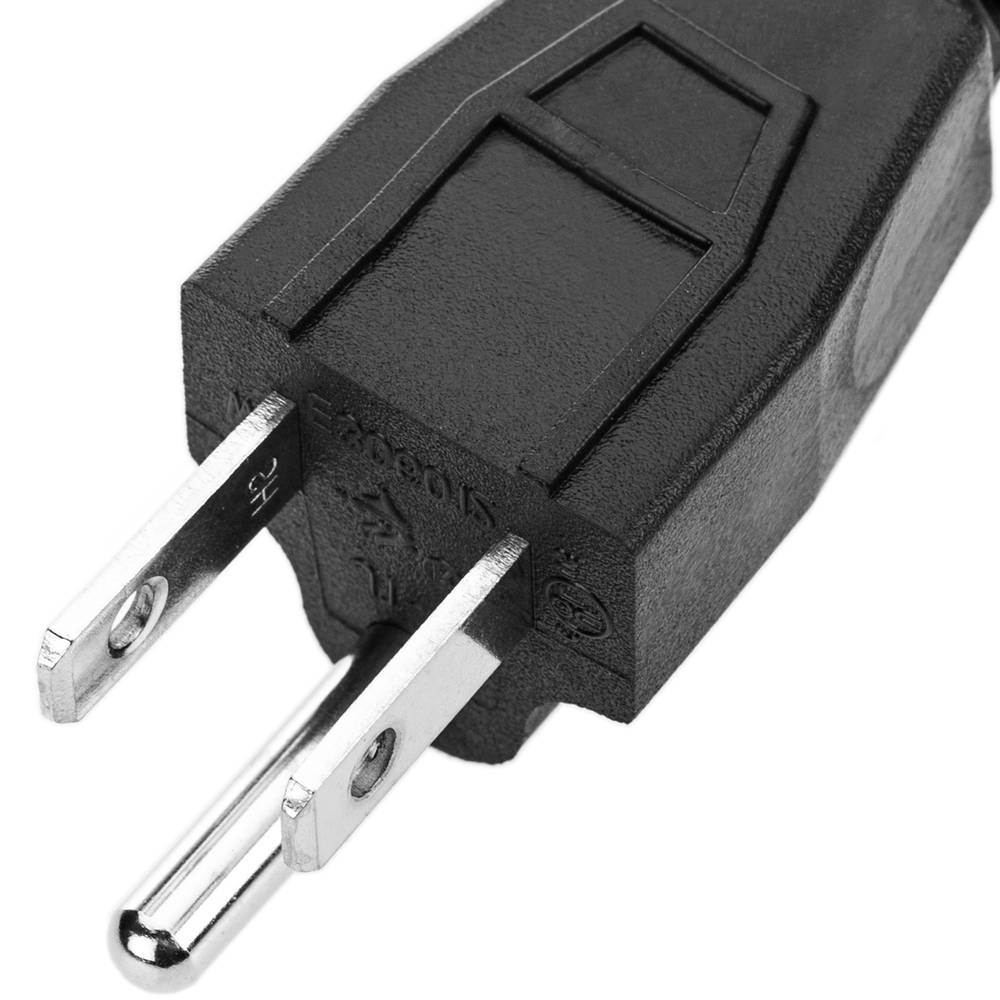
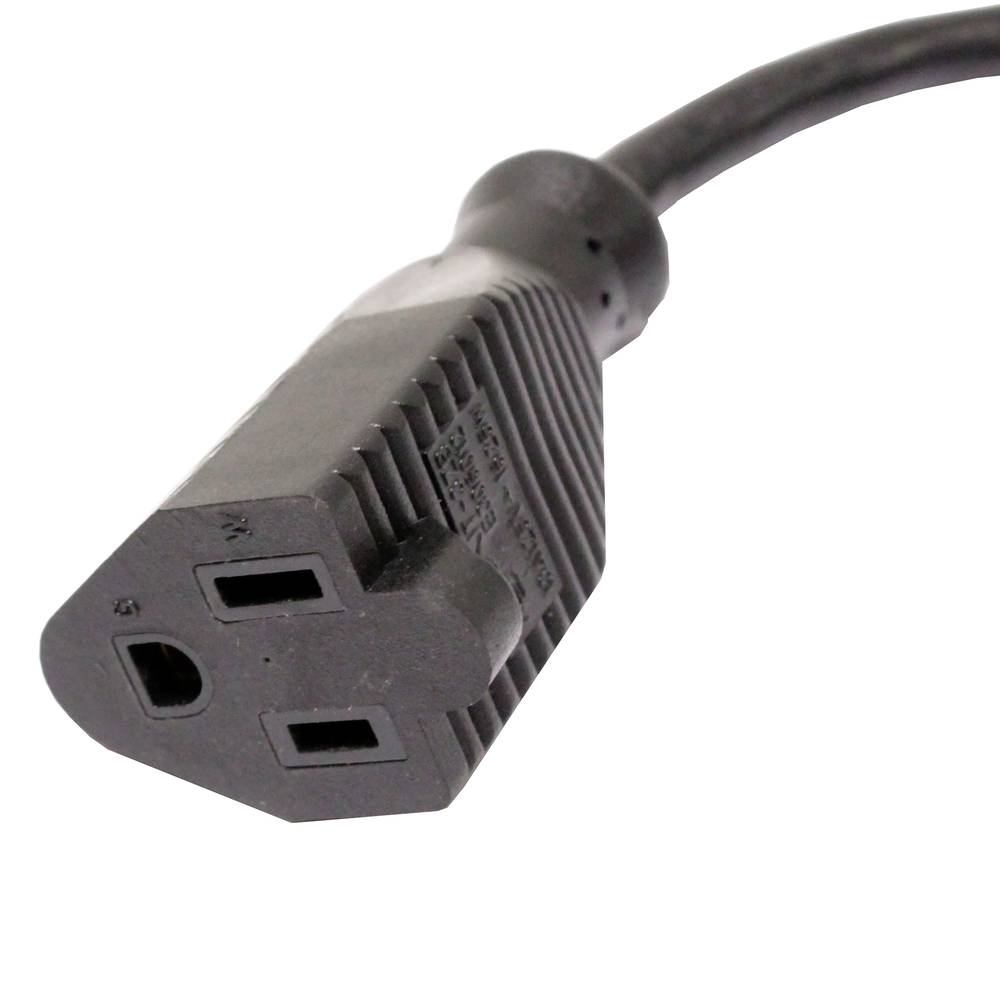
US electrical/power cable connectors/plugs/sockets/jacks
NewerOlder